Why is there a shield?
One
of the most characteristic images of the Panzerschreck is the profile
of
the shield. The shield was made of thin sheet metal, but
that was all that was needed for the job. The RPzB Granate 4322 had a
rocket motor that just burnt too slow. The
result was an exhaust of burning powder particles for the first 2
meters. Without any protection the firer would sustain severe burns to
eyes, face and hands. Likewise, it was not a good idea to occupy the
space behind the tube when a shot was fired
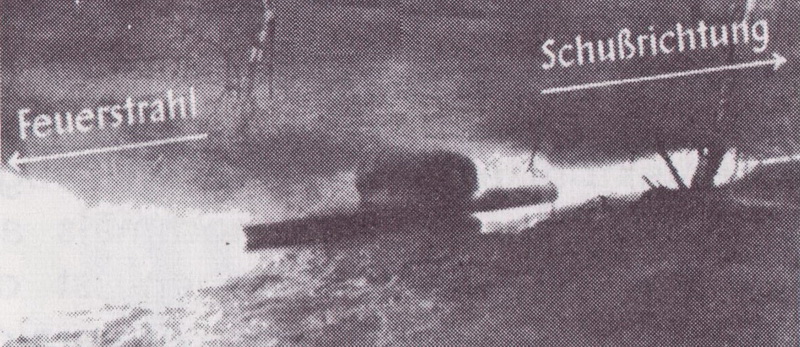
A
instructional slide that shows the hazards created by the rocket motor
of the RPzB granate 4322.
Waiting for the real thing
The
biggest problem with the Panzerschreck when it was issued for
frontline service was the absence of the shield that just
wasn't invented yet. To remedy this problem a simple set of
protection
gear had to be used, consisting of a gas mask (without a filter), a
padded winter hood and padded winter gloves.
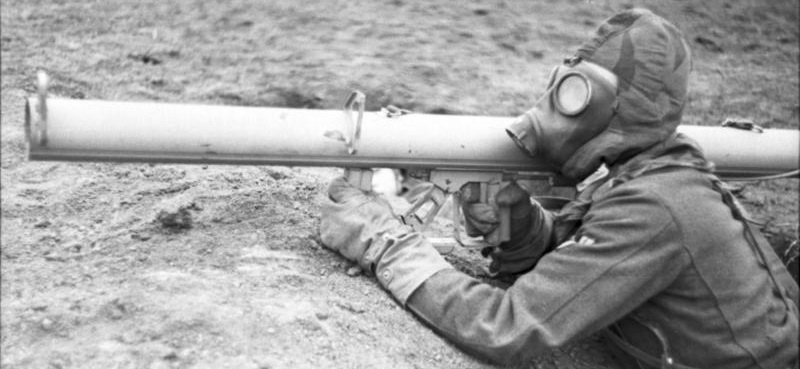
Ukraine,
spring 1944. Playing by the rules. The correct gear has been put on.
The
first official instructions concerning the wear of clothing can be
found in the D 1864/2 "8,8 cm R Pz B
54 mit 8,8 cm R Pz B Gr 4322 Gebrauchsanleitung" vom 6.1.1944 (Never
found a copy, so no further details). This manual describes the attire
needed to safely fire the weapon (as the shield was not
invented yet). The shield first appears in the D 1864/5 from
24
February 1944, but pictorial evidence suggests that the full
deliverance of the shields to the front line took another 7-8 months to
complete. At the time the instructions were issued approximately 80.000
Panzerschrecks had already been manufactured and issued to the front.
"Von der Front für die Front" dated 6 June 1944 simply states that "Der
Panzerschreck ist ein Kriegskind" (A child of war). Since priority had
to be given to a speedy development in order to equip the troops with
adequate anti-tank weapons the system has several shortcomings. And the
biggest problem was apparently the need for the firer to wear the
protective gear. "In many cases the troops themselves have made their
own shields that can be mounted on the tube with a
clamp and that have a window of Plexiglas or similar materials.
Production of shields is ongoing, but if for some reason
these doesn't reach the front troops the units Waffenmeister can make
them locally, using the D 1864/5 as a guide."
"Von der
Front für
die Front" dated 8. September 1944 states that reports are still being
received from the front about soldiers being wounded from burns due to
missing protection clothing and absence of shields on their
Panzerschrecks. As a remedy the units are once again prompted to
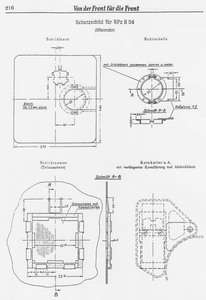
make their own shields and this time a blueprint for a
unit-made
shield followed the publication.
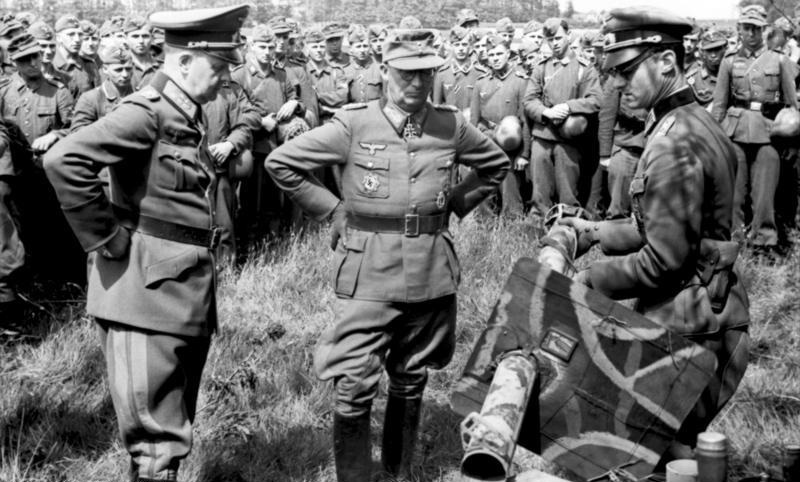
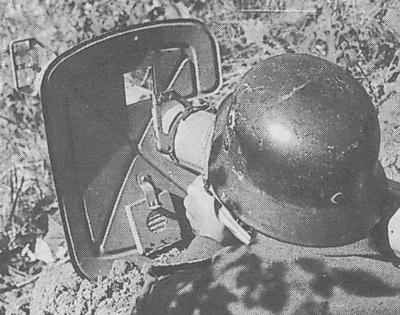
A
weapons demonstration for the brass, somewhere in France May 1944. The
Model I front sight is still in use.
As
a result of the problems encountered with the wearing of the
protective gear and the promised shields not showing
up the troops themselves had long ago designed their own
shields to remedy the problem. The shield in the picture
above was made from scrap metal and appears to be heavy, as the window
isn't in line with the sights. Of special note are the wires that have
been attached to hold camouflage and the "Handschutz" (Hand protection)
visible to the left viewed from the front.
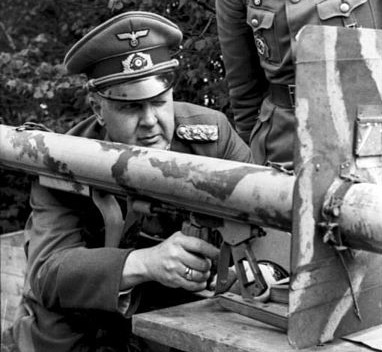 |
Another
view from the same event. The Handschutz is very well made and even has
a overlapping lip at the bottom. The design of the actual plate used
for the hand protection is almost identical with the design illustrated
in a "Von der Front für die Front" publication.
The shield has been affixed with a homemade wingnut fastener and strap |
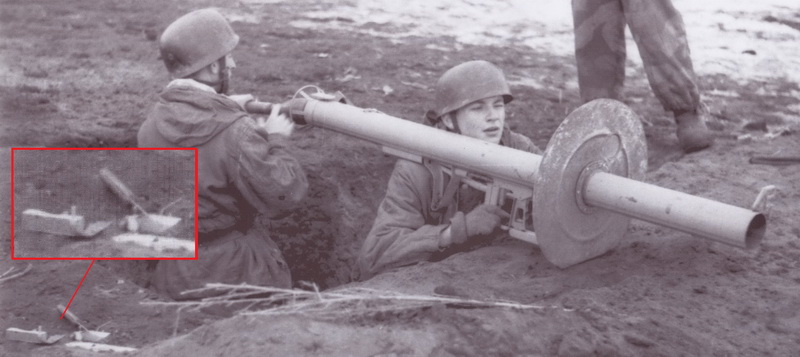
Fallschirmjäger
in the Soviet Union in the start of the year 1944
The
shield in this picture is totally different from any other improvised
shield, and from what can be seen appears to have had another function
from the start (Dustbin lid?). Note the small window. It does not
confirm to the standards set in the manual D 1864/1, as
it appears
to be non-removable. Also worth noticing is the discarded wooden dowel
with electric connector from a previously fired round lying in the
lower left corner of the picture.
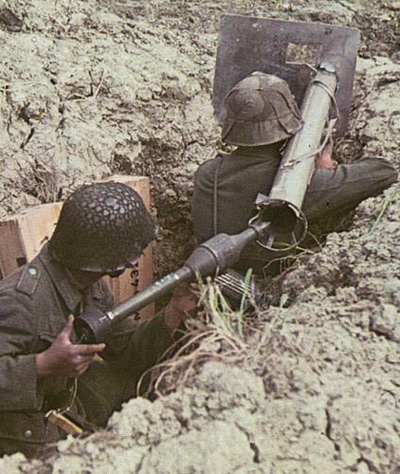 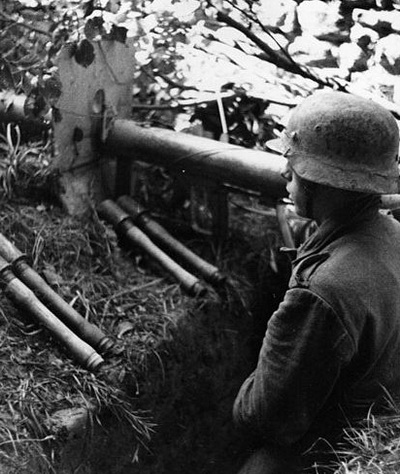
More
examples of improvised shields. The right picture was taken in France,
summer of 1944.
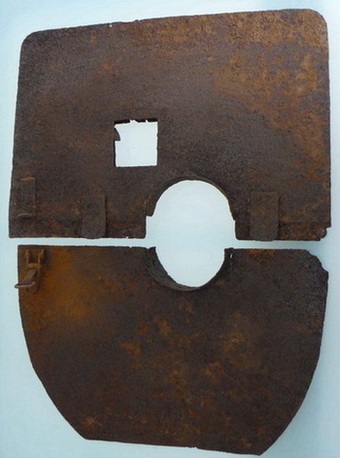 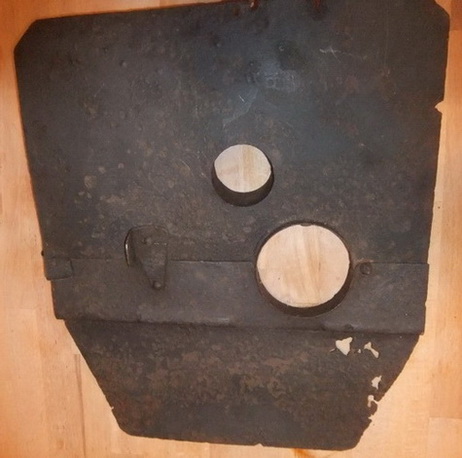
Two
ground dug specimens of improvised Panzerschreck shields. The right one
strongly resembles the one in the picture above right. Both shields
from "Collection Petigny".

Yet
another version of Waffenmeister made shield. Unlike the two models
above, this model has a improvised "attachment mechanism". A flat iron
has been bent and mounted below the opening for the tube. This would
correspond with the forward surface of the trigger guard, enabling the
gunner to hold it in place. Pictures courtesy of Vladimir.

And
even yet another variety! This shield was found in the
vicinity of
the town of Polotsk. Pictures courtesy of Alexander, Belarus.
The
official issue
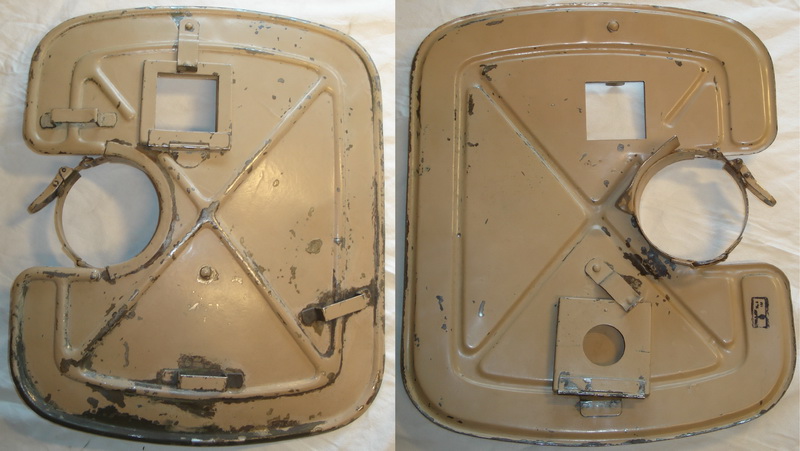
The
shield came in two documented varieties. It appears to be
factory variations, and not a matter of product developments. The only
difference being a depression for the spare glass windows. Apart from
this they appear to have been manufactured unchanged from February 1944
to the end of the war, maybe with one exception for the RPzB54/1.
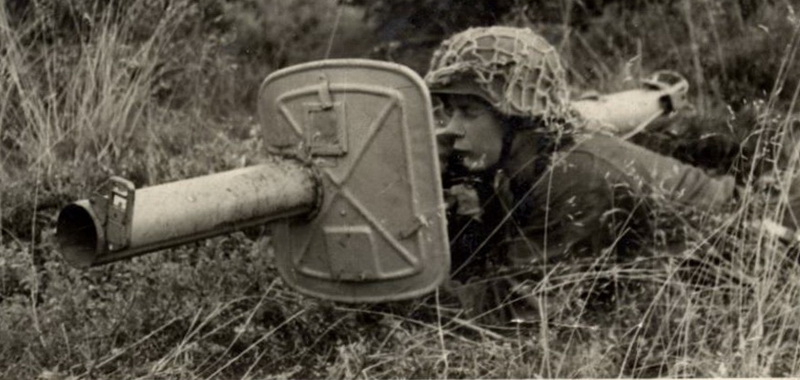
The
picture above show the version 2 model of the shield with the depressed
compartment for spare glasses.
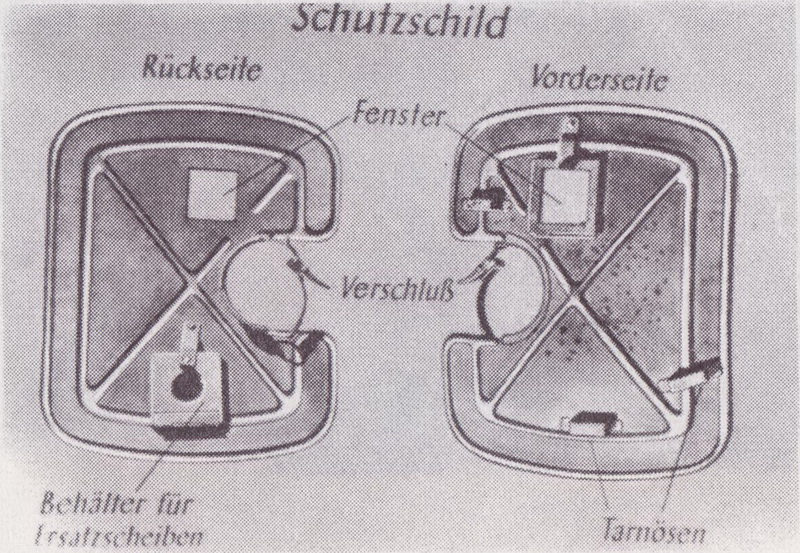
From the D 1864/5:
The
shield protects the firer against the burning powder
particles that will be flying to the rear from the grenade that has
been fired. When the shield has been mounted the
instructions in D 1864/2 concerning the use of a gasmask, hood and
gloves will no longer apply. The firer can use a steel helmet or field
cap.
Warning: Only shoot
with the
shield mounted. Wounds to the head or hands will be the result
without it.
The brackets on
the front of the shield are used to fasten camouflage.
The
shield should be fastened in front of the rear sight with the box-clamp
so that the shield is fastened tight, and placed so the firer can see
through the window when aiming.
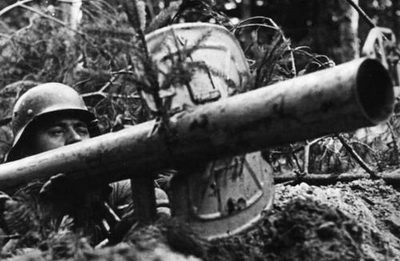 |
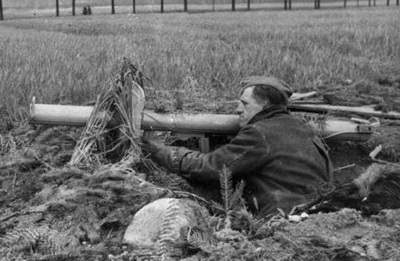 |
| A "clu"
shield with a sprinkle of camouflage attached to the brackets. |
Straws
mounted in the camouflage brackets (Tarnöse). |
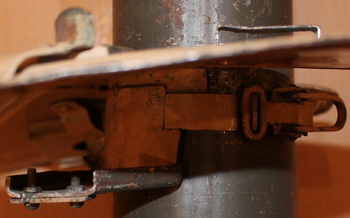
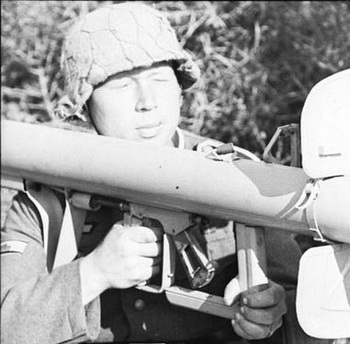
The
shield was in fact issued with a fail-safe mounting bracket. The
"anti-twist bracket" protrudes to the rear and fits inside the hollow
front of the rear sight. It would
ensure that the window was in line with the sights and that the off-set
weight didn't cause the shield to tilt so that the sightline got
blocked. Pictorial evidence show that the bracket was used most
of the time, but some have ignored the functionality it provided.
 |
 |
| The
"anti-twist" bracket mounted in the correct position. |
The
shield is mounted too close to the muzzle and the
bracket has no function. |
The glass window was supposed to
be prepared before mounting. The tape that held the wooden dowel to the
rear of the RPzB Granate was re-used on the glass.
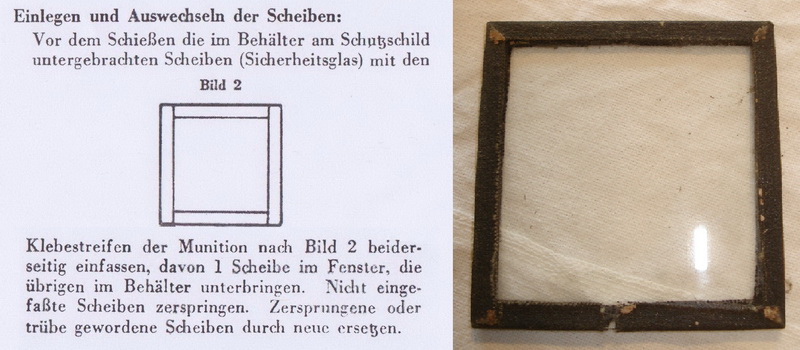
A
set of two spares should be prepared the same way and stored in the box
on the shield.
"Glass that isn't taped around the edge will shatter.
Exchange glass that has shattered or is damaged with a
replacement."
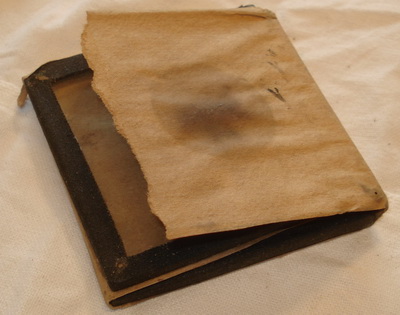
Often these spare pieces of glass were separated/isolated
with
paper to preserve them.
 |
 |
| Wrapped
and ready for the spare glass box. Note the black circle from previous
use & storage. |
The
spare pieces of glass on this shield appear to be wrapped in corrugated
carton. |
And
once again the re-supply of crucial but cheap components was made easy!
This text is from the official approval of the RPzB 54 with ammunition
and accessories, the Heerestechnische Verordnungsblatt from 1 September
1944.
 |
One spare glass for the shield is
included in every R-Munitionskasten 4322.
The
troops will collect the spare glasses from the ammunition boxes. Glass
that hasn't been used will be kept by the firer as spares.
|
And
then finally on 15 January 1945 in the Heerestechnische
Verordnungsblatt that officially approves the RPzB 54/1 with the new
ammunition that was also intended for the RPzB 54 the following text
can be found:
 |
New improved glass for the shield
is included in the ammunition boxes.
The
new weapon has already got the new parts (glass and sights).
|
The
"ammunition box" was for the new rocket, the RPzB granate 4992. The
new improved glass was a safety glass with two laminated pieces of
glass.

In
this slide the cardboard box with the spare glass is clearly visible.
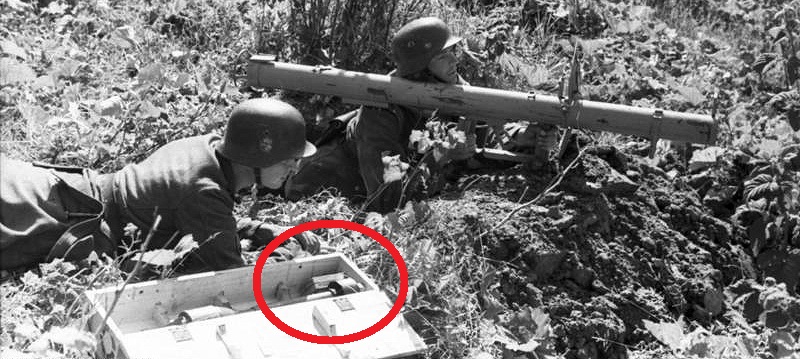
Northern
Russia August 1944. This ammunition carrier has saved up an
extra box and carries two spares around.
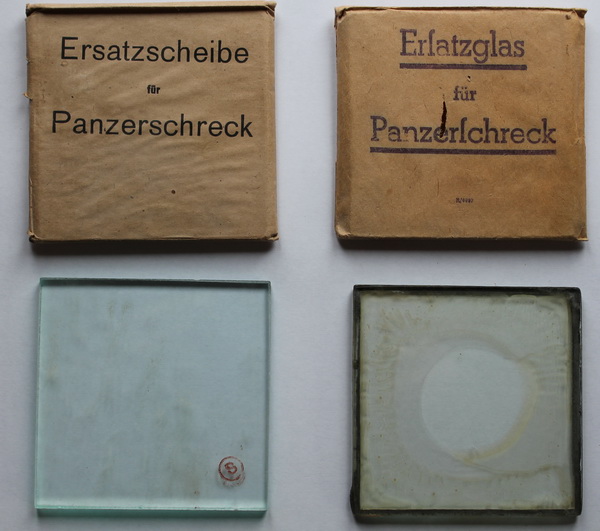
Two
varieties of the glass for the window. The different names
(Glas/Scheibe) were used side-by-side. Both have their paper-envelope
intact, but no cardboard box.
The
glass to the left above is the standard one-piece glass. The right
glass
is the improved glass from January 1945, laminated by gluing two
single pieces of glass together. It is maker marked in white
ink in the
lower right corner with "mfv" for Mühlig-Union Glasindustrie
AG, Teplitz-Schönau".
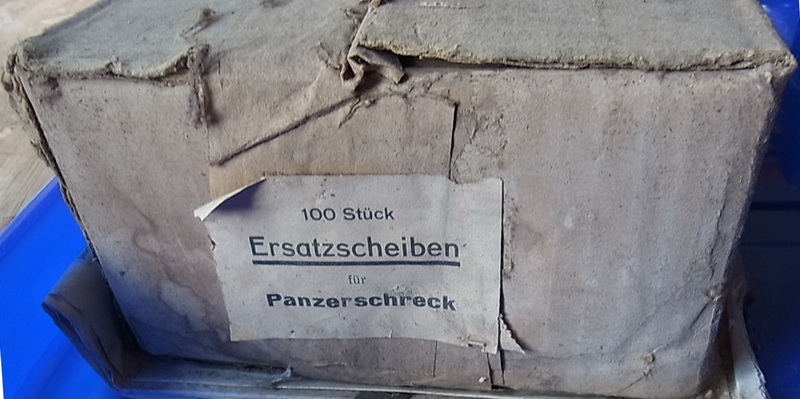
(Picture courtesy of Detlef W.)
A
full box of 100 spares. This box would likely have ended up with the
shield manufacturer or with one of the arsenals that boxed up the R Pz B Gr 4322.
Improving
the shield
The
D 1864/1 had a annex number 3 at the end with improvements suggested by
the troops. In reality just a "Best of" from the "Von der Front für die
Front" publications.
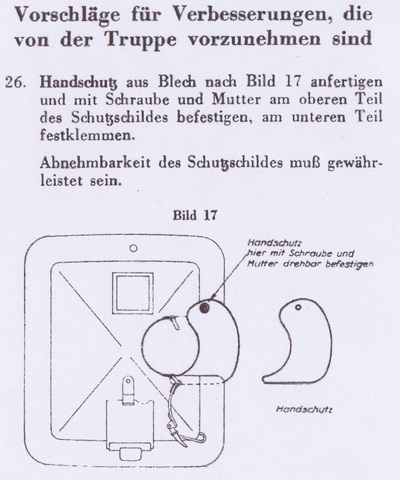 |
One
of these improvements was a piece of sheet metal that was bolted to the
right side of the shield to protect the right hand of the firer.
Without this additional shield a
glove had to be worn to avoid severe burns to the hand.
It
is stressed that the shield must still be detachable.
|
I
haven't managed to find any picture of a RPzB 54 with the standard
shield that has had this improvement implemented. The closest I get
are the pictures at the top of this page from the weapons demo, but
that is a improvised shield.
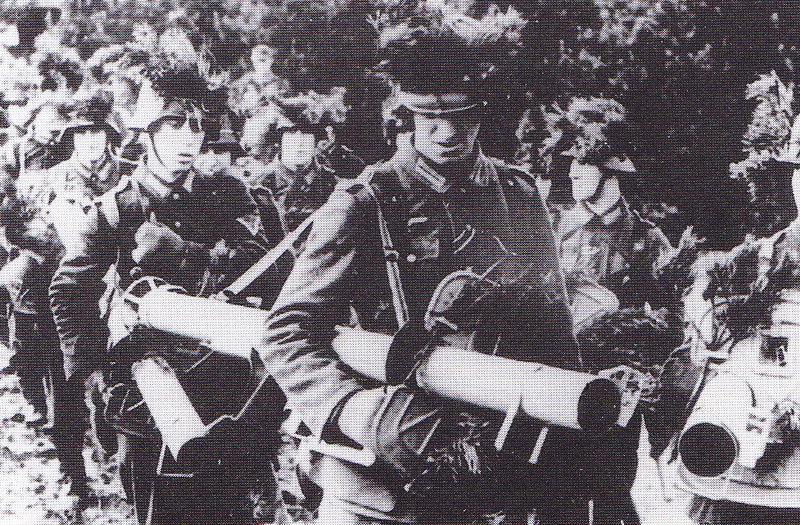
A
newly formed Volksgrenadierdivision. Note the camouflaged shields and a
improvised hand guard unlike the prescribed model.
The shield delivered with the RPzB 54/1 appears to have had
the improvement implemented in the rebuild process
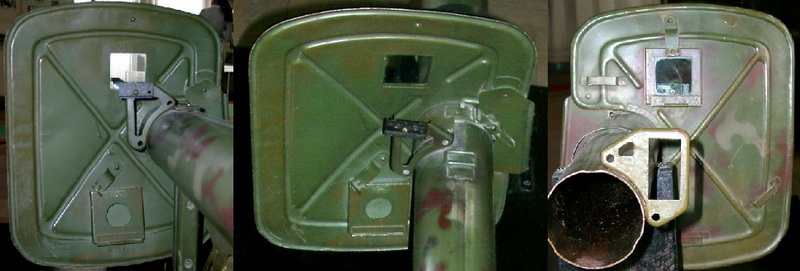
A
RPzB 54/1 as "touchable" exhibit in a Russian museum.
A
picture from the manual D 1864/6 for the RPzB 54/1. The handprotector
has clearly been installed on this prototype of the rebuild.
The only other original picture from the era I have seen
of a RPzB 54/1 has what MIGHT be a Handschutz, but the picture is not
clear on that subject. Picture can be studied at the very end of the
page about the sights.
The
Mystico corner
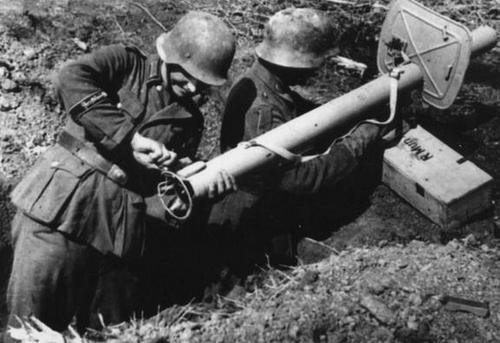 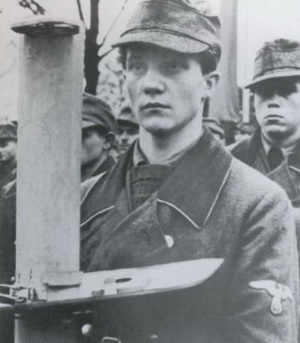
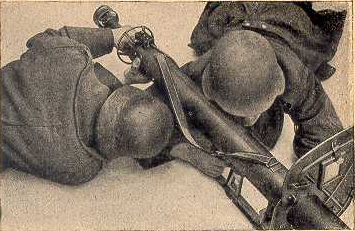
By
mounting the
shield back to front and tilting it 900
it was possible to use the shield in a manner not described in any
manual. This could of course be credited to ignorance when it comes to
the Volksturm youth above right, but hardly the case with the
Grossdeutschland soldiers above left. Some have a theory that this was
done to get a lower profile, but that doesn't make sense. The
"Handhabe", the wood and steel frame around the coking handle/trigger
handle has the exact same height as the shield, so that would give no
effect
what so ever. The only explanation I can think of is that this
variation will give a better protection of the firers' right hand (but
leaving larger parts of his torso exposed). In addition the profile
will
be higher making the weapon easier to spot. The firer is still wearing
a glove. Maybe they are just checking to
see if it can be done.... note the wooden dowel in the lower right
corner. This is a shooting exercise and not a combat trench-picture".
|


 Panzerschreck
- The shield
