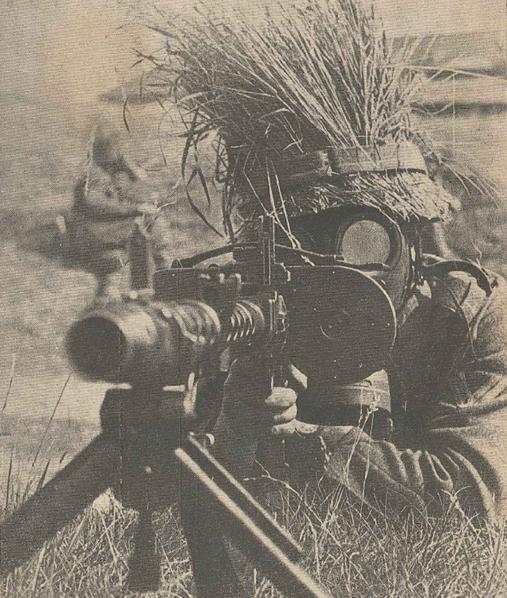
(Picture by courtesy of Carles
in Barcelona)
The
picture above shows a MG34 with a PT34 in a staged manouver photo. Note
how the top-strap
is interfering with the line-of-sight, as it hasn't been depressed
properly after the installation of the magazine.
Filling
the Patronentrommel 34
To
be able to fill the PT34 the
user will need some kind
of tool. The answer was a special machine named Trommelfûller
34. It consisted
of a gearbox, a vice, a hand
crank
and a funnel. All parts could be stowed inside a standard Patronkasten
34.
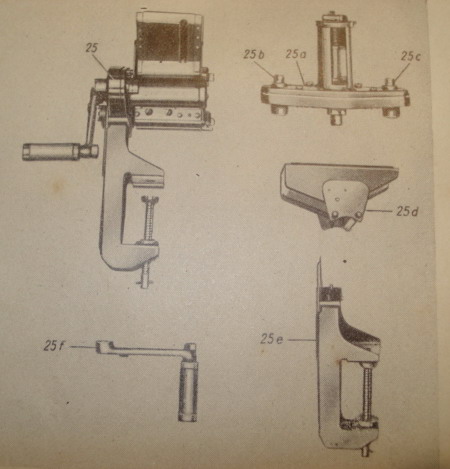
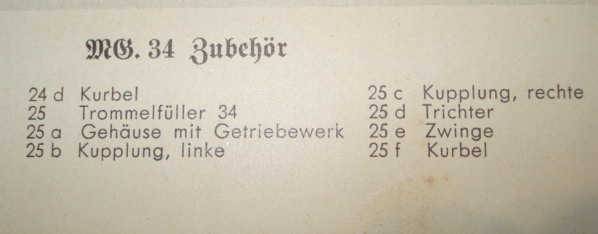
The different parts are shown above with the correct names. A empty
magazine was inserted
upside-down on the rail below the funnel.
The Trommelfüller 34 is
described in D124/1 as late as in 1941, so obviously it must have seen
some use between 1934 and 1941.
Instructions are quite simple: Insert a
empty magazine, make sure the followers are visible in the "0" window
at the rear of the magazine. If this is not the case, use the
Trommelschlüsseln to adjust.
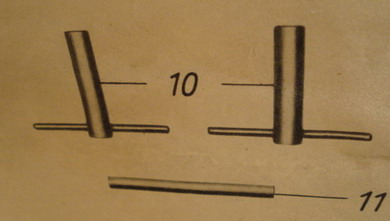
Trommelschlüsseln
und Sperrohr zu den Trommelschlüsseln
Fill
the
funnel with 75 rounds. As the magazine will not function properly if it
is overfilled, it is important that the correct number of cartridges is
put into the funnel. By turning the crank-handle the drum will be
filled with the cartridges placed in the funnel.
To empty the
magazine, place it upside down and use a stick of hardwood and press
the cartridges forward one at the time until the magazine is empty. Of
note is the fact that the D-T 15 had a specially designed tool made of
bakelite for this purpose!
Up
untill now, no surviving
example has been known to exist. Then this set of pictures surfaced in
France!
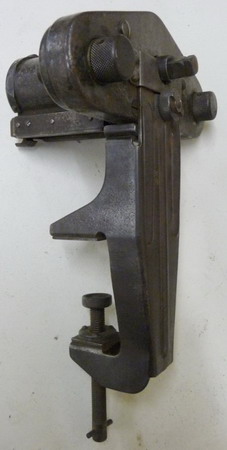
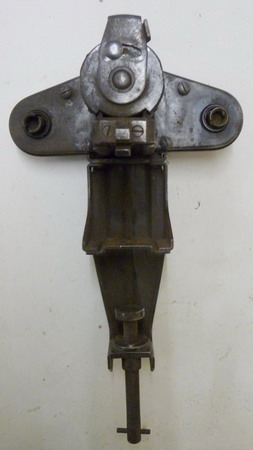
Pictures courtesy of Gurtsack France!
This
clearly is
a surviving example of the Trommelfüller 34.
And
then another Trommelfüller 34 was "unearthened" in Russia!
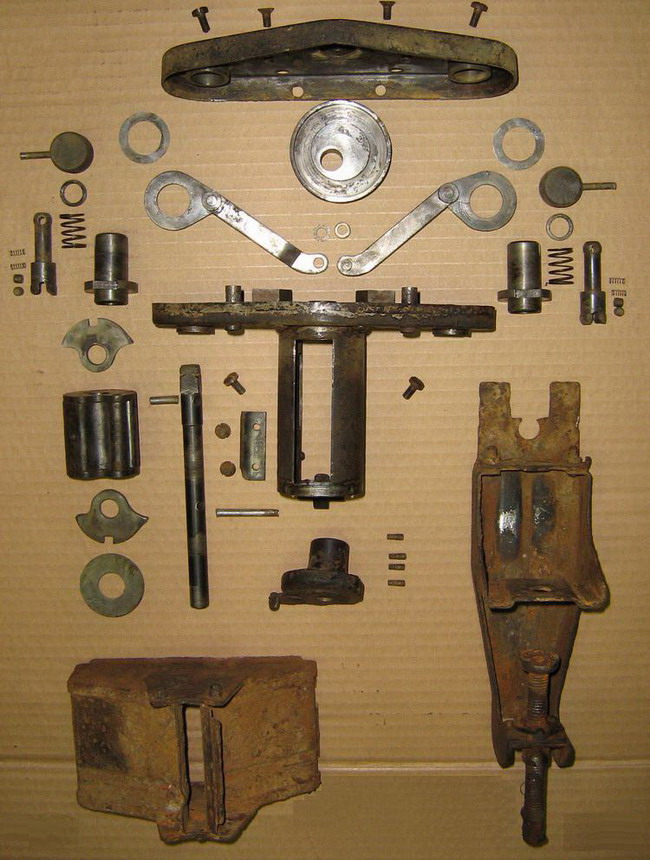
This
picture by courtesy of David in Moscow! This one has clearly been dug
up, but is very interesting as it is displayed in parts!
And again,
the D-T 15 was issued with a loader of it's own that apparently also
could be used with the PT34. It consisted of a simple wood-board that
held the magazine upside-down, a ratchet mechanism with a lever-arm and
a very small "funnel"/stripper-clips holder.
Adjusting
the Patronentrommel
The
PT34 was a finely tuned
machinery. Too weak springs would lead to feed-failure, and too hard
springs would lead to the gun jamming, as the bolt spring would be
unable to overcome the pressure of the cartridges against the magazine
lips. To top this, both springs would need to work perfectly in
synchronization to ensure that the feeding occurred
from both drums.
The drum
spring-adjustment was not carried out by the user. The
manual clearly states that any trouble with the feeding should first be
remedied with the Trommelschlüsseln. "Wiederholen
sich Störungen bei einzelnen Patronentrommeln, so ist die Federspannung
durch das Waffentechnische Personal zu verändern". If
feeding
problems persist with specific PT34's, the springs should be adjusted
by Ordnance personnel! It is easy enough to figure out how it was done,
but not the correct procedure applied. None of the handbooks I have
access to says anything about the actual process.
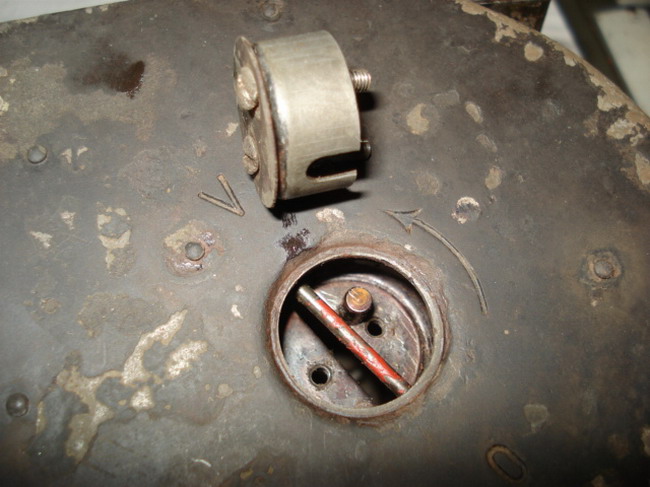
To
get access to the springs, the two disks covering the holes on the
front plate must be removed. The two tiny screws are permanently
affixed to the disks, so they will not be lost! With the disks removed
the construction of the simplified spring is easy to see!
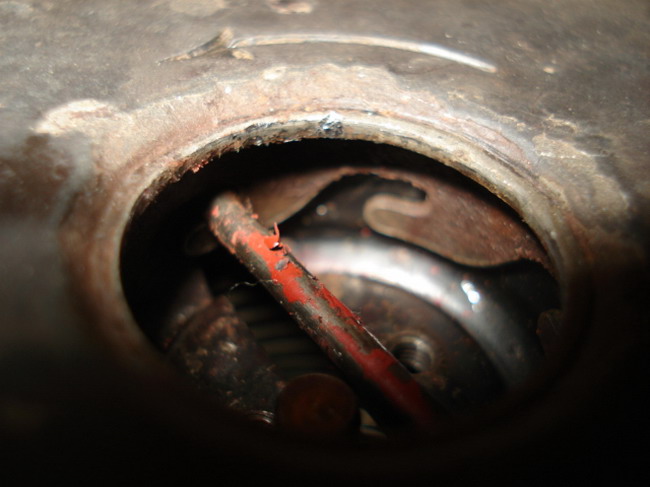
The
coiled spring has a final that goes across the last coil. This straight
piece of the spring is arrested in teeth that follow the inner wall of
the front plate all around the hole, so that two opposing teeth will
always hold the coil in the right place and tension. When the covering
disk is installed it will lock the coil final in the choosen
position.
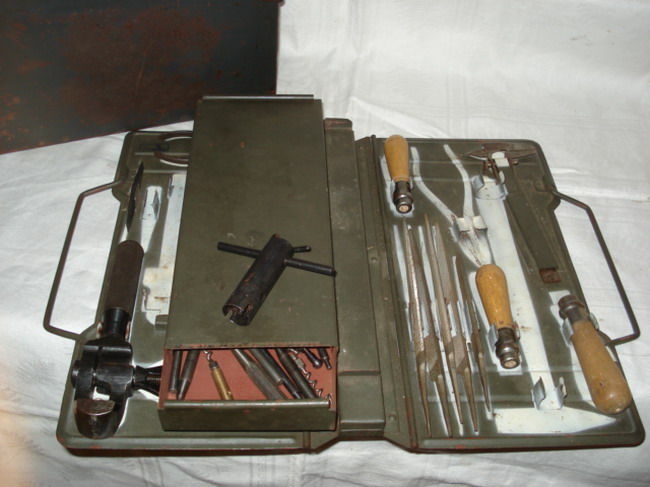
The
coil can be adjusted with a pair of pliers, but the Germans had of
course designed a special tool for the job! The name of it is not
known. My example came with a “Kleines Waffenmeister Kiste” and was
manufactured in
1943, the same year as the PT34 definitively had gone out of fashion!
This one was made by “dpq”,
Bruno Mädler, Werkzeugfabrik, Berlin.
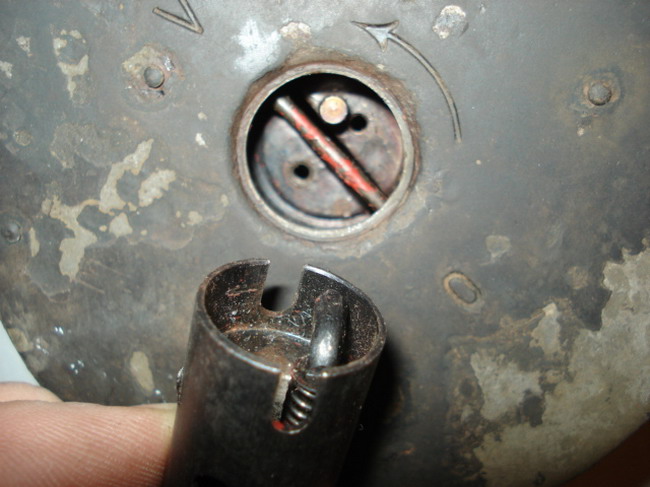
The
tool is very simple to use. First make sure the locking lever is not
covering the axis between the notches in the tool, insert it into the
hole and make sure the notches and the coil final lines up. Then turn
the locking lever so that the coil final is held firmly arrested in the
notches of the tool. The coil can now be wound and unwound with the
tool while pressing the spring in so that the final disengages from
the teeth. Pulling the tool out will bring the coil final into locking
position between the teeth again!
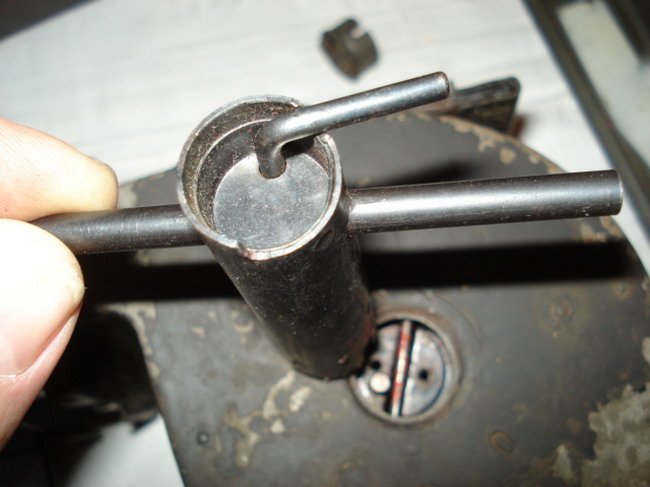
When
the adjustment has been made, the locking arm is turned again and the
tool can be withdrawn.
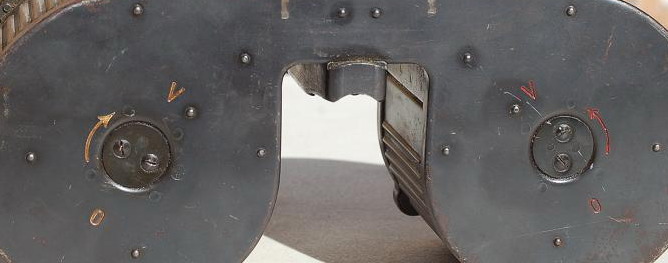
(Pictured above is a PT34 that was sold on
the WAF in 2008)
The
front of the magazine housing has impressed a “0”, presumably for zero
tension, an arrow indicating increased pressure (these arrows point in
opposite directions of course) and a “V”, presumably for Verschärfung
(tightening). Also
note that the springs have been painted red or white (picture further
up), and that the colour of the markings on the magazine housing
corresponds with the springs. Most probably to ensure that the correct
spring was installed on the correct side!
My
best guess in regards
to adjustment is that the spring was
“zeroed”, and then it was ensured that the cartridges were held firmly
in place. Too weak springs would allow cartridge # 2 to jam in the
feeding. Springs would have to be tightened until feeding ran smoothly.
Over tightening the springs would lead to feed failure, as the pressure
of the bolt spring would be unable to overcome the magazine spring
pressure on the cartridges. This procedure would be done on the gun
with “Werkzeugpatronen”
(tool-cartridges) or by using a broken firing pin, and repeatedly
cycling the gun by hand with the magazine installed.
Final
approval would acquire the gun to be test-fired with a full magazine.
|